Hosted form
- Introduction
- Basic workflow
- Authentication
- Basic hosted form example
- Validating the transaction status
- Hosted form options
- Alternative templates
- Form customization
- Iframe integration
Introduction
The hosted form mode is the easiest way to integrate Payplug.
It also prevents you from being impacted by PCI-DSS constraints, since none of the sensitive data (card code, cryptogram) passes through your servers.
Basic workflow
Here is a simple diagram illustrating the hosted form workflow.

- You display a form to the user with all Payplug parameters as hidden fields.
- The user submits the form through his browser. The submit process will result in redirecting the user to the Payplug platform with all Payplug parameters in a
POSTrequest. - Payplug displays a payment form to the user, in which he can fill in his card data.
- The user submits the payment form, then the card data transit from the user’s browser to the Payplug platform.
- The Payplug platform sends a request to the bank network and waits for the result.
- Payplug redirects the user to the merchant’s website on the
REDIRECT_URLor a specific one (see Redirect URLs) along with the transaction parameters (of whichEXECCODEandTRANSACTIONID). - In parallel, the transaction result is confirmed by a notification request sent to the merchant’s ‘
NOTIFICATION_URLcontaining the transaction’s parameters (of whichEXECCODEandTRANSACTIONID).
info
The
REDIRECT_URLand theNOTIFICATION_URLcan be configured through the Payplug dashboard, in the technical account configuration.
Authentication
In order to be authenticated, your transaction request must be signed with the dalenys_signature function as described in the authentication section.
Basic hosted form example
Here is a simple code sample to display a Payplug hosted payment form:
<form method="post" action="https://secure-test.dalenys.com/front/form/process">
    <input type="hidden" name="IDENTIFIER" value="Demo Shop" />
    <input type="hidden" name="OPERATIONTYPE" value="payment" />
    <input type="hidden" name="AMOUNT" value="12345" />
    <input type="hidden" name="CLIENTEMAIL" value="[email protected]" />
    <input type="hidden" name="CLIENTIDENT" value="john.snow.12" />
    <input type="hidden" name="DESCRIPTION" value="Cart content" />
    <input type="hidden" name="ORDERID" value="YYYYMMDD_123456" />
    <input type="hidden" name="VERSION" value="3.0" />
    <input type="hidden" name="HASH" value="ce8bbb35a820b5fc63a3630503c7a0a354cbb5455268817cb2348e659245987a" />
    <input type="submit" value="Pay" />
</form>
Validating the transaction status
In the hosted form mode (contrary to the server-to-server mode), the request is not directly initiated from the merchant’s platform to Payplug, thus you need to process the transaction result through both the notification and the redirection, separately.
warning
Keep in mind that the notification request is sent asynchronously (by default). It means that you can receive the notification before or after the user redirection to your platform.
Hosted form options
The hosted form is easily customized with several options described below.
Expiration date
If you don’t want a displayed payment form to live forever, you can configure it to expire after a certain date.
info
The
TIMEZONEmust be specified.
-
TIMEZONE string(1-128)
Timezone / default value : UTC. Please see the Data sheet dedicated list of available timezones.
Example: Europe/Paris
-
TRANSACTIONEXPIRATIONDATE datetime(yyyy-MM-dd HH:mm:ss)
Form expiration date. By default, the date is UTC, the timezone can be specified by using the TIMEZONE parameter.
Example:
Fields pre-filling and/or hiding
It is possible to display the form with pre-filled fields, if you already have the relevant user data in your database.
Indeed, if you supply CLIENTEMAIL and/or CARDFULLNAME fields, they will appear already filled in the payment form.
If you supply these fields you can even choose to hide them by using optional fields HIDECLIENTEMAIL and HIDECARDFULLNAME valued to “yes”.
Enabling the user to choose to create an ALIAS for next transactions
Please refer to the Operations / Recurring payment section to setup recurring payment with aliases.
Even though you can create an alias on all your transactions, you can also leave it up to the user to do so, by using the optional parameter DISPLAYCREATEALIAS valued to yes.
This option will display a checkbox to the user, enabling him to choose whether he wants to be enrolled in your recurring payment strategy or not.
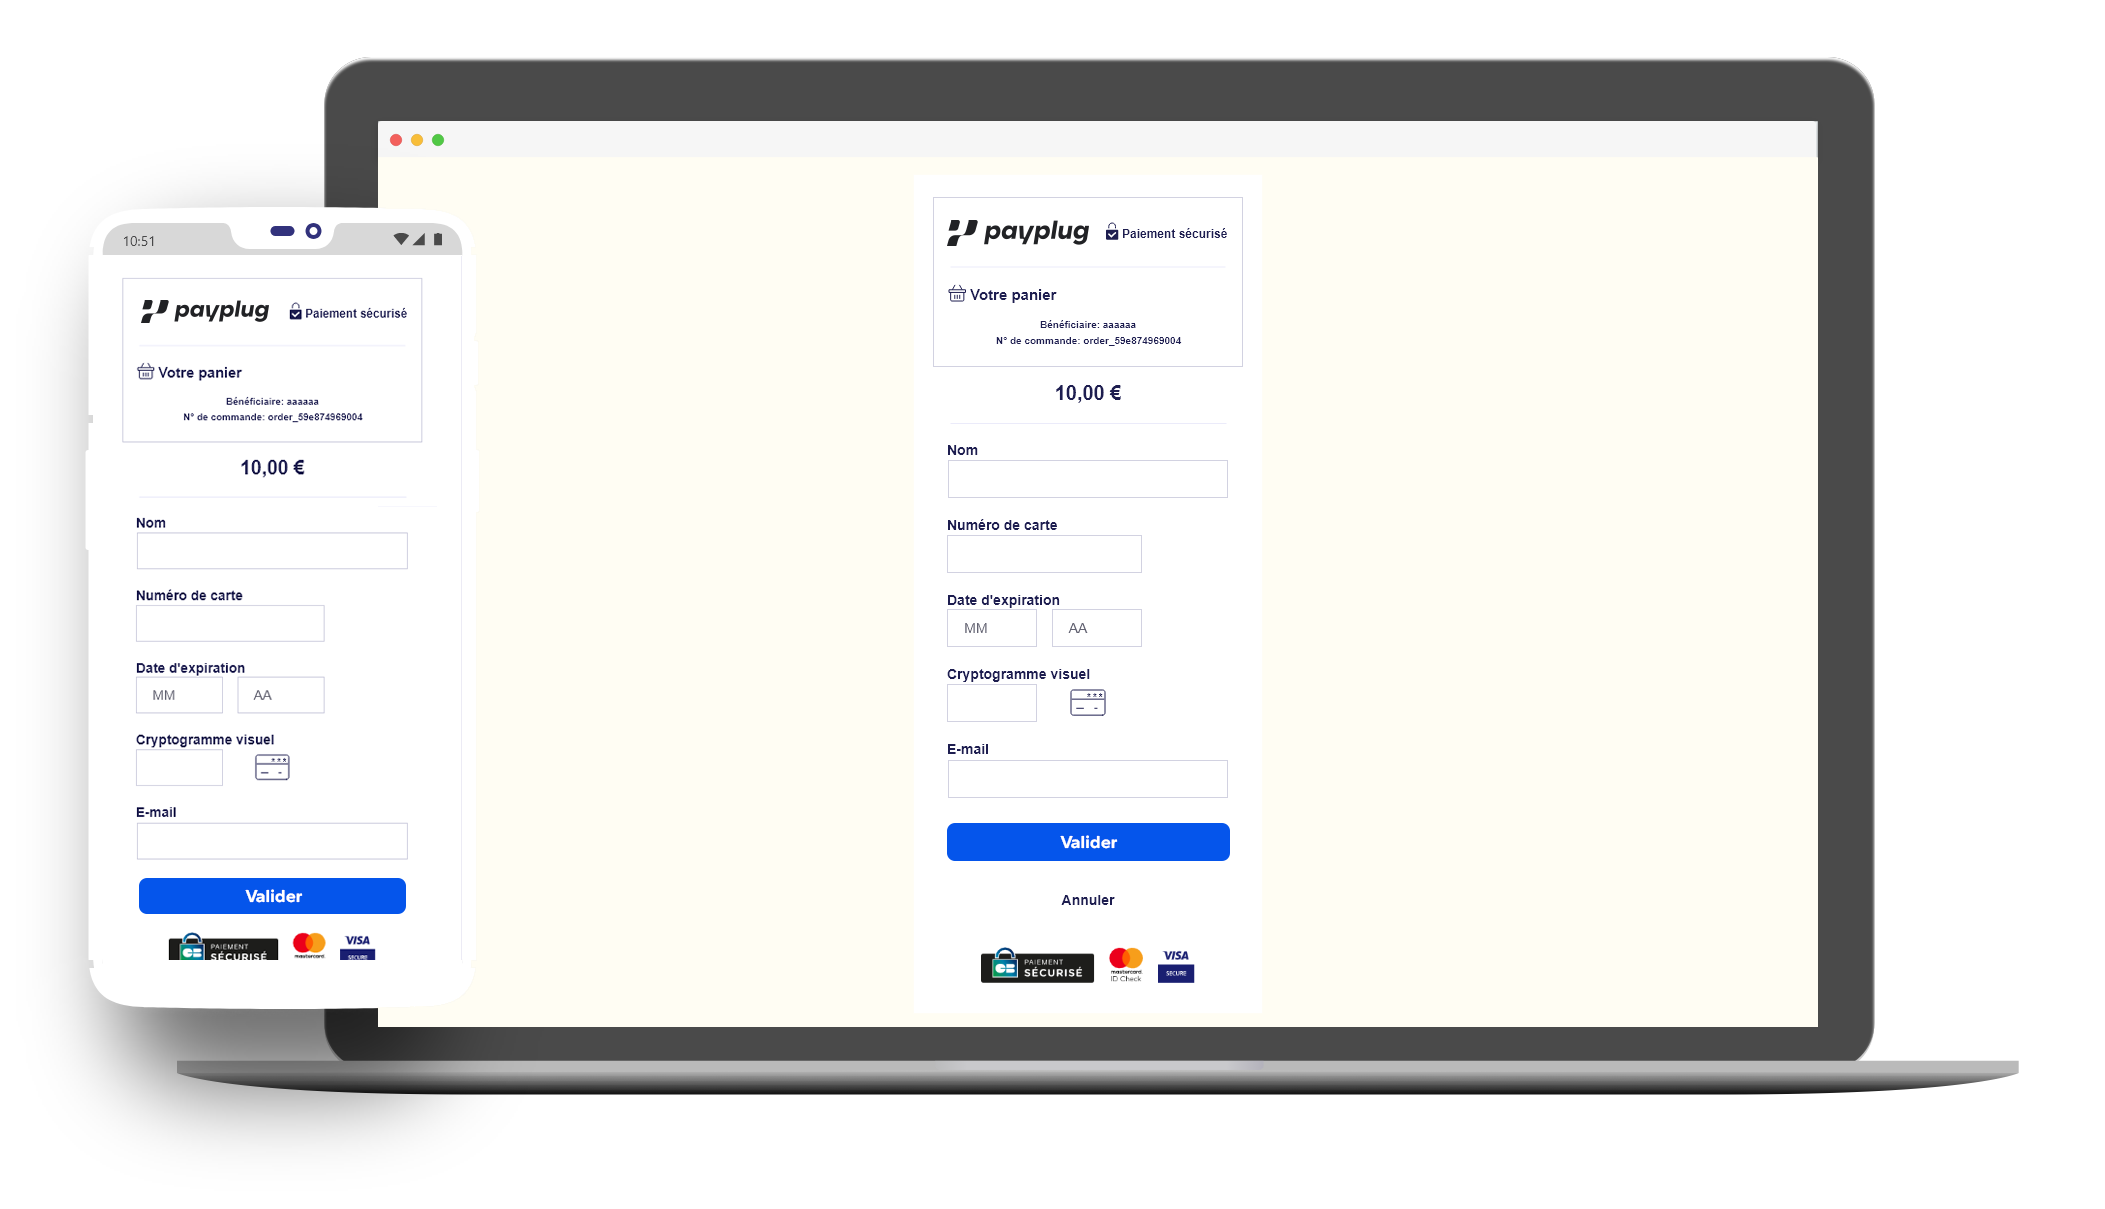
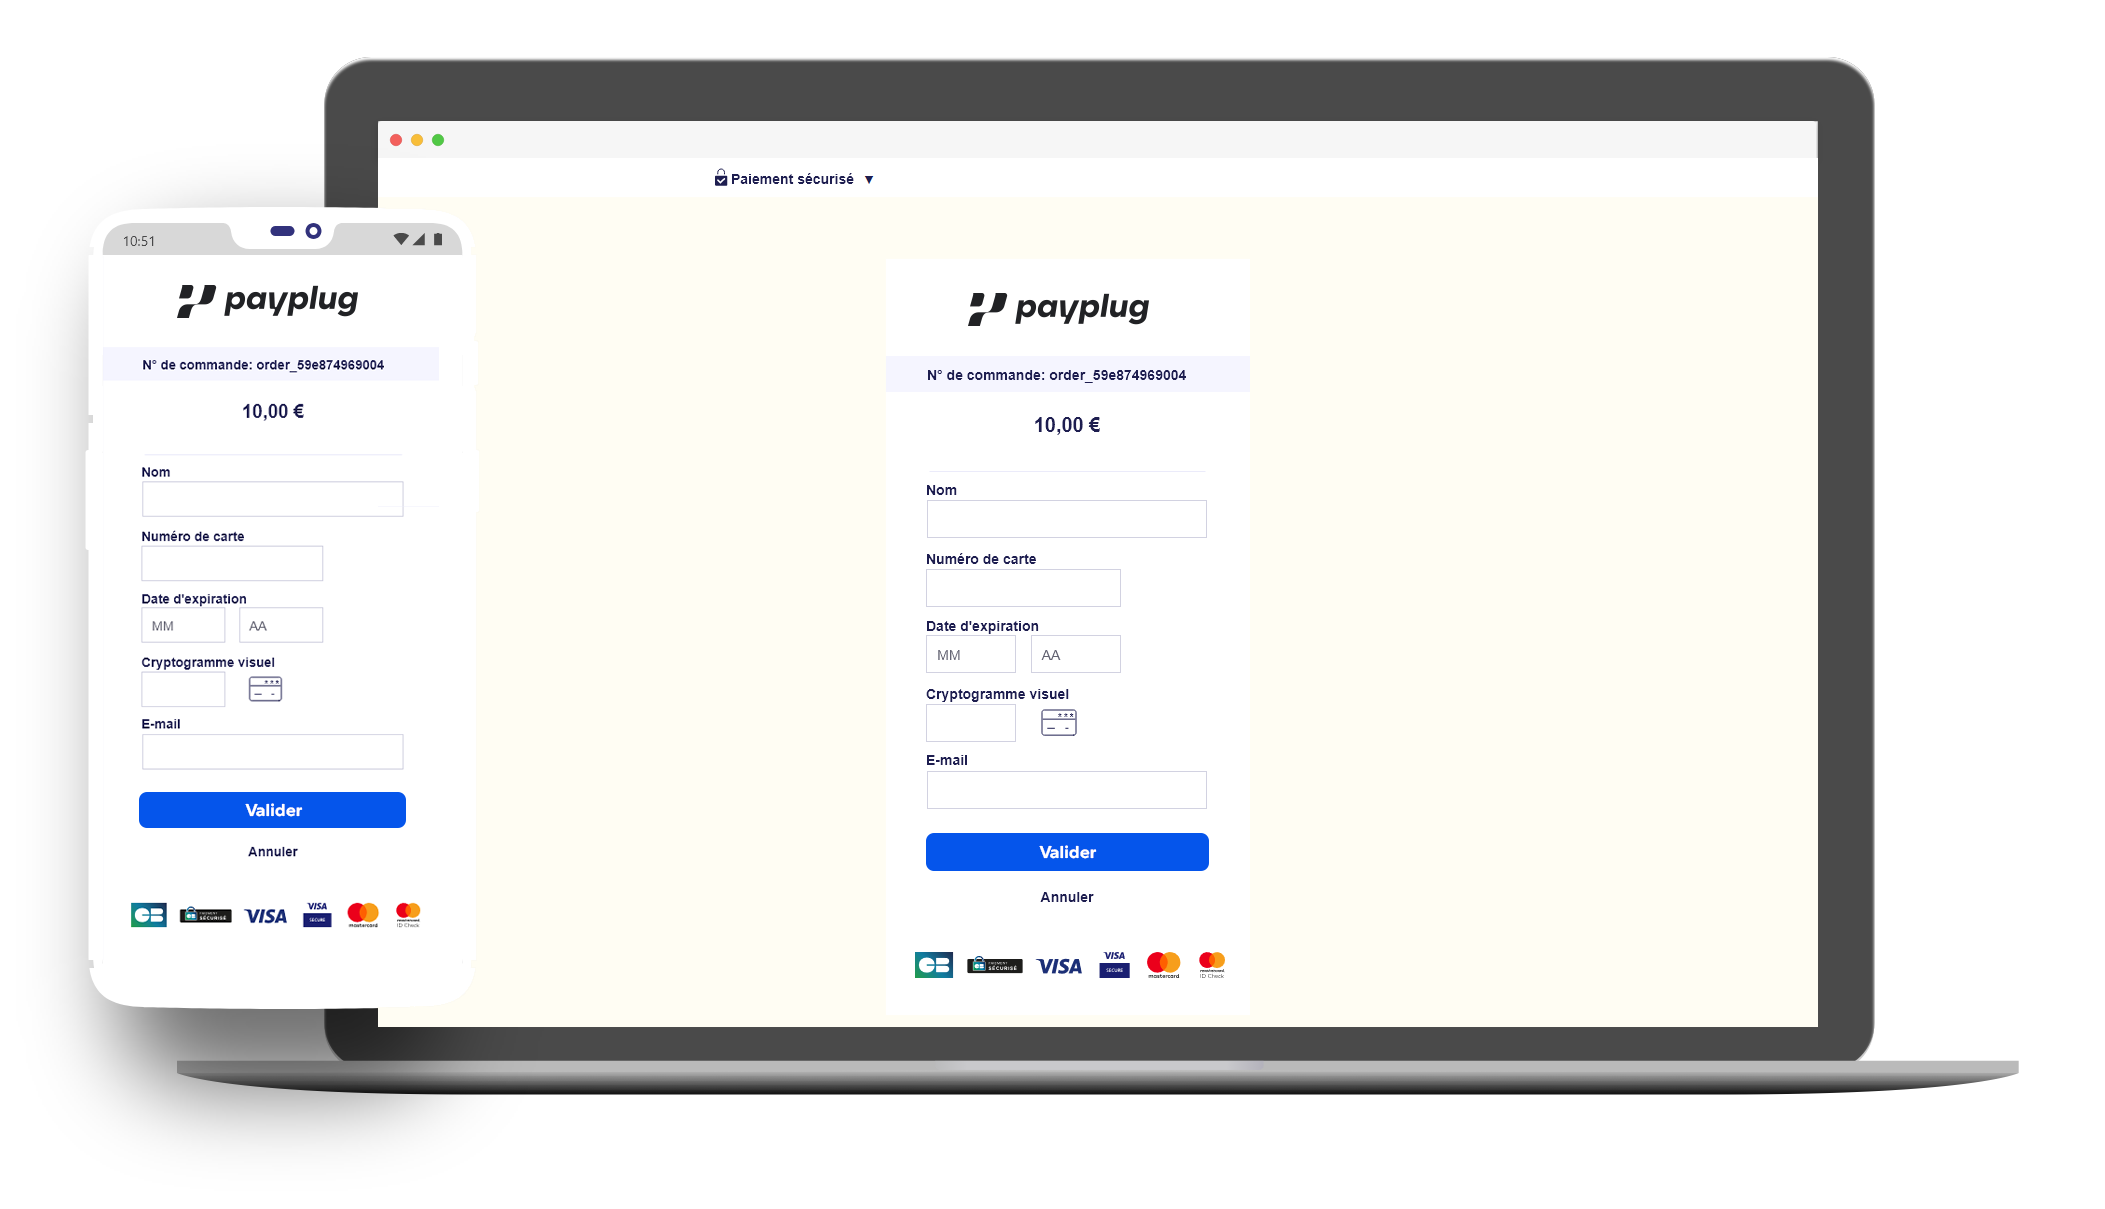
Alternative templates
You can use one of the following 2 alternative responsive templates provided by Payplug.
To set up a template on a Payplug account, simply copy / paste the URL in the TEMPLATE_URL field in Payplug Dashboard, in the technical account configuration.
warning
Please ensure to use an adapted template to your payment account type.
- https://form-template.dalenys.com/template1
- https://form-template.dalenys.com/template1_amex
- https://form-template.dalenys.com/template2
- https://form-template.dalenys.com/template2_amex
Form customization
It is possible to customize your payment form at your will by providing an url pointing to your own platform in the TEMPLATE_URL field in Payplug Dashboard, in the technical account configuration.
You can configure up to 2 templates URLs, one dedicated to desktop display, the other one to mobile device display.
For each form transaction, the Payplug platform will try to fetch the appropriate template registered as TEMPLATE_URL, but you can manually specify which template to use by using the USETEMPLATE parameter:
-
USETEMPLATE
web,mobileWhich custom payment form to use.
Example: web
reminder
Remember that the template is called with the POST method. Some Web servers as Microsoft IIS won’t allow POST calls on HTML files by default.
tips
some useful parameters, such as the amount or the order number are returned in POST method in order to be exploited on your custom template.
tips
If you provide resources such as stylesheets, images (…) in your template, you must use absolute links, since relative linking will not work. All your links must be HTTPS links with a valid certificate, otherwise the user’s browser will display security alerts.
The template should be a classic and valid HTML page containing a %PLACEHOLDER% string which will be replaced by the Payplug payment method specific form HTML code.
Placeholder content
To facilitate the design of your template, you can download this demo HTML file containing the code that will be injected into your custom template instead of the %PLACEHOLDER% tag.
Fallback mode
info
If the
TEMPLATE_URLpage is too slow or not reachable, the Payplug default page will be used instead.

Mobile devices
We highly recommend to force numeric keyboard display on mobile devices for the card code and card CVV fields, by adding Javascript :
<script type="text/javascript">
    function displayNumericKeyboard(elemId) {
        document.getElementById(elemId).type = "tel";
    }
</script>

<body
    onload="displayNumericKeyboard('b2b-ccnum-input'); displayNumericKeyboard('b2b-cvv-input');"
></body>
Iframe integration
It is even possible to use this customization mode through an iframe to ensure a better payment integration.
iframe integration is a good solution to easily include your payment page in your website.
info
With
iframemode, the payment page will be displayed in the browser with your ownTLScertificate through your own domain name.

Remember that after the payment form validation, the REDIRECT_URL will be displayed only in the iframe.
If you want to redirect in the whole parent page, you must use some JavaScript as in this example :
<script type="text/javascript">
    window.top.location.href = "http://myshop.com/payment/confirmation";
</script>